
It's a purpally, red, gold smokey eye lol with my normal foundation routine. You can definitely mix and match with the colours and recreate this look but to hit the nail exactly I used the Lorac Pro palette and MUA Academy undress me too palette.
Lets get started!
1. Prime time

So for me, the first step is priming. You can use any primer you want. I have oily skin and after a while my foundation starts to look reaaaaaally shiny so, I use milk of magnesia which is God's gift to people with oily skin. It really helps to control oil. I let that really seap into my skin. In the bottom right picture I looked like I just slapped myself but lets continue guys :).
2. Eyebrows
Okay, so I start by using a spooley to brush my eyebrows and to make sure that all the hairs go in the same direction. I'm using the dual ended spooley and angle brush from Primark. To fill in my brows I'm using the second to darkest shade from a makeup revolution eye shadow palette but you can use whatever you want. Secret: I filled in with eye liner before - gel.

3. Conceal and don't let them feel
Next up, use your concealer and angle brush (different to what you used to fill in the brows) I'm using LA Girl Pro conceal in the shade Dark Cocoa GC88. I like this colour, it's close to my skin tone and it gives a subtle highlight. I find the LA Girl applicator to be really heavy so I squeeze a little on my hand and use the angle brush. I line the underneath of my eyebrows and then blend the colour into my skin with the angle brush. I line the top too but that's totally optional.


4. Leftover concealer
Use the leftover concealer as a base for your eye shadow by patting it onto your eyelids. If you don't like to get messy you can use brushes but I've always loved finger application!

5. Proper eye shadow base.
I'm using the Lorac behind the scenes eye shadow primer but you can use anything that's an eye shadow primer and just pat it into everywhere there will be eye shadow. Use a wet wipe to wipe of anywhere there shouldn't be eye shadow because it sticks easily to the primer.

6. The actual eyeshadow!
So first I'm going in with the colour taupe for my brow bone highlight. I just sweep this under the highest point of my brow which adds extra highlight. The I'm going to add my transition colour. This colour is a colour close to your skin tone which makes the blending a lot easier. My transition colour will be a lot different to yours, it depends on your undertone. I have some reds and oranges in my undertone so I use a little red with a brown. For my transition colour I'm using Garnet and Sable from the Lorac pro palette (Love this combo). As you can see - Garnet is my most used colour lol. I sweep that above my eyelid but not on it. The brush I'm using is a dual ended brush from the naked 3 palette from Urban Decay.

For the next part we are starting to add depth and dimension so for details we're using my dual ended brush from primark or just a pencil brush. I forgot to show which colour in the palette but for this we're using deep purple. Any dark purple will do. It's shiny by the way not matte. We're gonna make a few dots with it in the outer corner and the sweep into the crease creating a V shape. You end up with really harsh purple lines. Make sure you do it lower than the transition colour so you get a gradient but high enough so you still see the primer on the eyelid.

Next, I'm going back with naked 3 brush and using "deep purple" to blend out the colours so we don't have sharp lines. Then, get a shimmery Gold ready. My Gold is from the MUA undress me too palette which is like super super pigmented.

Here's the fun part. Put your favourite gold all over your eyelid try not to get rid of the purple though. The best way to apply this is by wetting your brush. It makes the eye shadow stick instead of it flaking down onto your face.

Next, take something with a straight edge. I'm using my primer. Use your pencil brush to create another outer V using deep purple and black. and blend it inwards to about one third of the lid.

This is the extra fun part! Grab any gold glitter to intensify the look. I'm using a glitter eyeliner from an unknown brand called Rapsody, but you can buy these anywhere. Put this all over where the gold on the lid is. Then use your blending brush with no product on to blend it out.

Optional: Line the eyes. My eyeliner was so odd it hurt but you know, never mind.

7. Concealer
Most people do this after their foundation but I find doing it before saves a lot of foundation. If you think about it, when you put foundation on your T zone, it's going to be covered by your concealer highlight so why not just put foundation on the parts not covered? I'm using my two La Girl Pro concealers in GC87 - Beautiful Bronze and GC86 - Chesnut. I highlight my T zone, which includes a little of my forehead, under eyes, bridge of nose, cupids bow area and chin. I use a foundation brush to pat down the concealer and spread it out. I find that going in straight away with a beauty blender really makes everything disappear. Eventually I do use a beauty blender to blend everything in. I use the B. Beauty blender.

8. Foundation
For my foundation I'm using two. Mac matchmaster foundation in NW50 and Makeup Forever foundation in the shade 185. Most of the areas I pump the makeup forever as that's closest to my skin tone. As it's a little darker, I put one pump of the mac one on each side to even out the colour. Don't be fooled guys, I had some really strong lighting going on which was making me look lighter lol. I use a beauty blender to blend that in and also blend into my neck. We defo want to avoid concealer creasing, smile lines, gravy lines and flashback so lets blend well lol.

9. Bake!
I love this part of makeup, I think its so magical lol. Anyway I use the Ben nye translucent powder in Chesnut and normal baby powder. Strange right? I mentioned the two in my last haul so please check that out. When I mix the two I get a great highlight colour. I use a makeup wedge/sponge and just apply it to wherever I put concealer and the term bake implies we leave it for a while. This stuff is incredibly strong, so I don't leave it for long but, I'm going to go and do my contour then return.

10. Contour
For my contour I'm using the La Girl pro concealer in the shade GC89 - Mahogany (the darkest colour). Not much different from my skintone but I will later go over it. I contour the hollows of the cheeks, hair line and nose and sometimes cupids bow. The bottom two pictures are just me wiping of the powder.

I've wiped the powder off now I'm using my beauty blender to blend the rest of the contour. For my nose the beauty blender is too big so I used the brush that came with the smash box double exposure palette to blend my nose contour.

As mahogany doesn't do much for my skin, I use the fashion fair finishing powder in earth as more contour, in the same places.

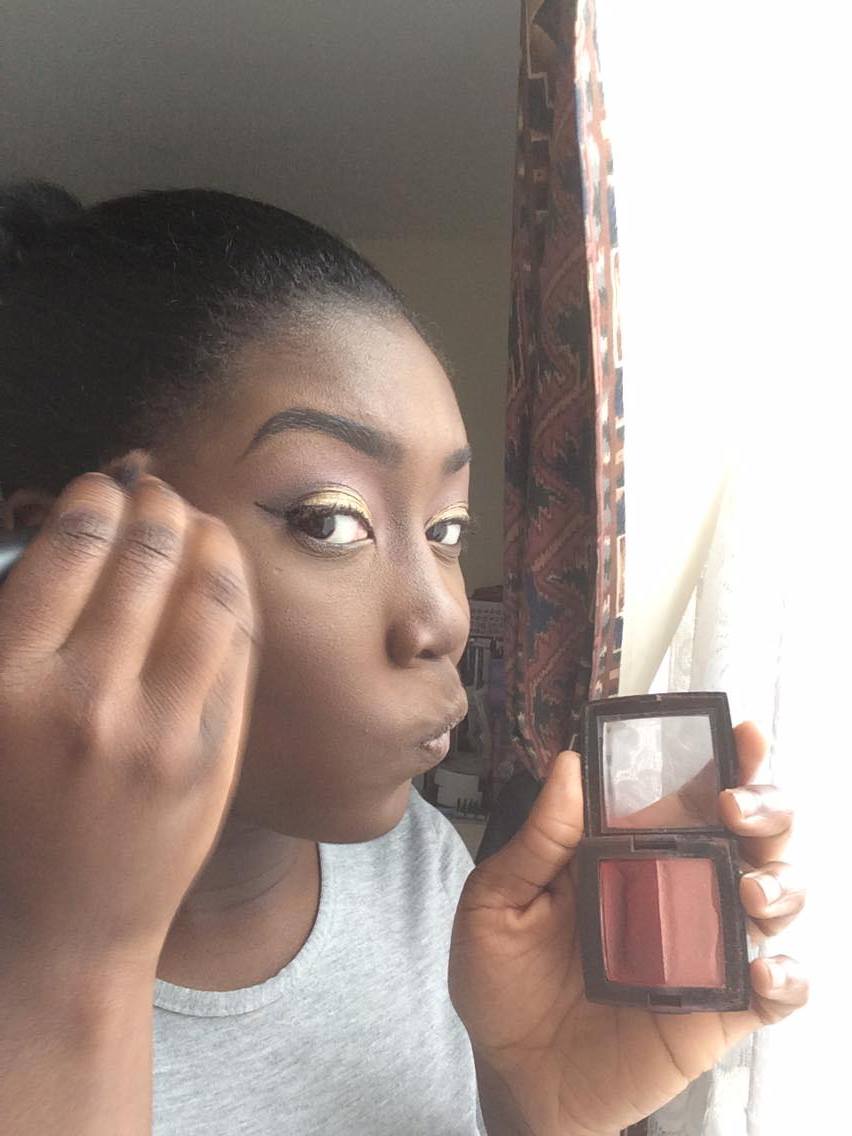
11. Blush
For blush I'm using this totally unknown blush with two colours. I'm using the darker red because the pink is a no go for people with my skin tone. I'm putting this just above my contour.
12. Mascara
I don't do this straight away because I like the eyes to chill a bit before I do any more so I do everything else and then come back to it. I'm using the 3D Fibre last duo from younique. It's a multiple step process to get your lashes looking how their adverts look lol. In case you have this, firstly apply their transplanting gel as a normal mascara then add the moodstruck fibres and repeat this step until you get the desired lash length and style. If you have the time to really get your lash style, perfect natural looking alternative to falsies, if not then falsies are good too. I just couldn't find mine lol.

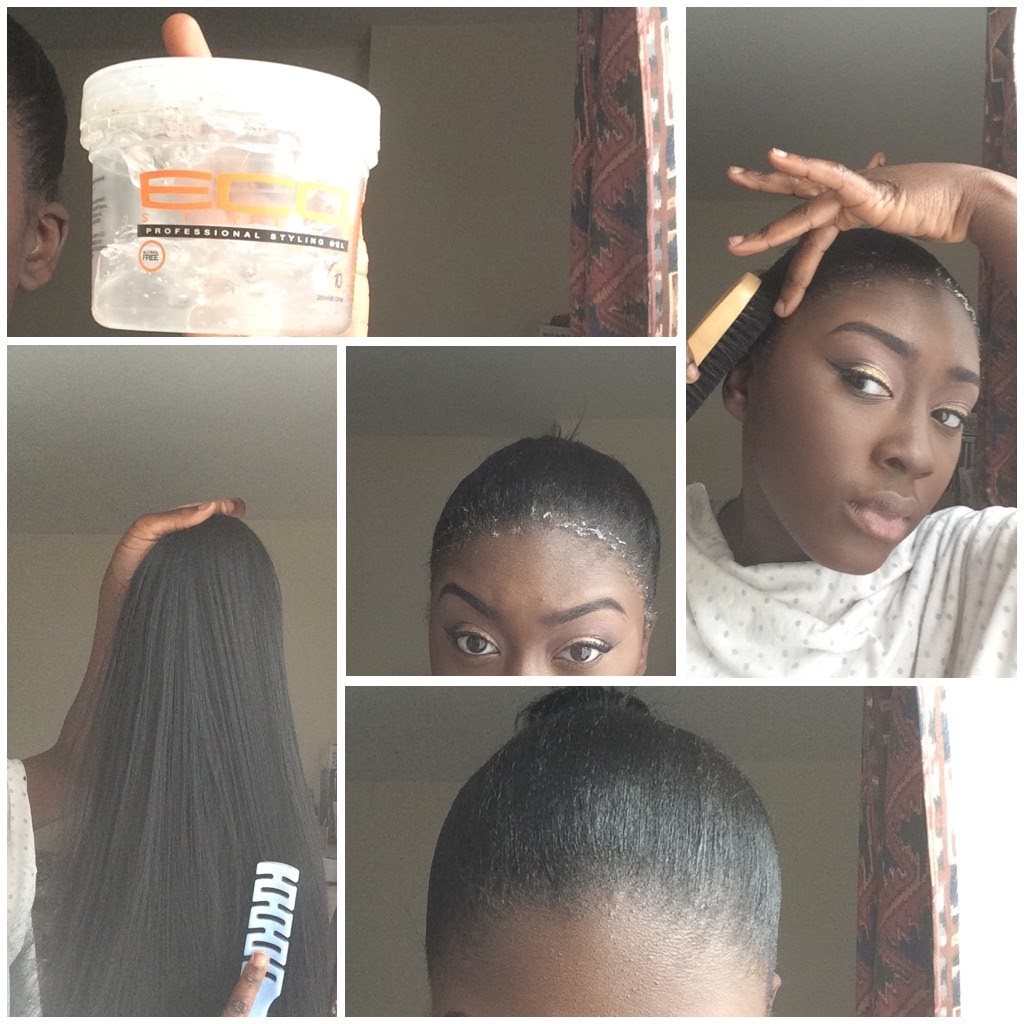
12. Makeup finally done, onto hair!
Firstly I brush out the hair to get rid of knots. and then tie it into a little bun. My hair was relaxed a week ago so this is much easier to do.

Use any gel, I'm using eco-styler which is £1.99 from most Afro-Caribbean hair shops. I'm putting it on the edges around my hairline and just letting it sit there. Then, I'm going to brush my hair back which slicks the edges down with the gel. Then I brush out my hair piece and attach it on :).
Our Finished look:

Wow! That was long. I hope you guys enjoyed this and comment on any tips I could use in my makeup. If you like these tips of posts please comment if you could like to see more!
Song of the day: Fuse ODG ft Joey B and Wretch 32 - Tingo
Lauren x
No comments:
Post a Comment